We all know about the advantages of testing. When project briefings or requirements change because of decisions outside the developer’s control (or the code evolves as part of an incremental process such as Scrum), it can be necessary to refactor or to change and adapt the existing code substantially. In this case, it is good to have checks in place that make sure the code is still working as intended, or in the case of visual regression tests, that the user interface just looks like before.
The same advantages of tests apply to accessibility testing, of course.
Let’s assume a fictional scenario A where the developer has read this book. They improved their code so that they now know about the different ways people can interact with your websites, the pitfalls and challenges that especially dynamic web content poses, and have learned to solve or circumvent them. The developer and their team have written accessibility tests to make sure the improvements don't break, even while refactoring. Adding a test suite that ensures, for example, that every input has an accessible name, makes sure that the test suite will inform them when they break the label by accident. They are aware that is easy to forget (re-)implementing them, because sometimes the accessible name is not visually rendered at all.
Scenario B assumes that a developer starts a new project but adds checks for accessibility even before writing any business logic as part of the “project scaffolding” process. The business logic can now be created in cooperation with linting tools and automatic code checkers like aXe. Accessibility testing does not stop here: our fictional developer could for example, add integration tests to check for comprehensible focus management. Having learned the web accessibility basics beforehand, they know which barriers can arise and which flows and features can break. Combining checkers and end-to-end tests, they get the maximum out of the accessibility testing toolbox.
Both scenarios are legitimate, and it would be best to combine the two. Both scenarios, however, share the inherent limitation of automated tests: Even all tests returning green won’t ensure that your web app is accessible for everyone because you can only detect so much accessibility errors automatically. And accessibility is at its core about human variety and human experience. Thus, barriers neither can’t be remedied nor analyzed completely in a fully automated way.
#Automated tests are no miracle workers
Automated tests are helpers but only will get you so far, ensuring your app is accessible. Machines shine in determining states and relationships, the existence or non-existence of things, but lack real human judgement. Take alt attributes for images, for example. Automated tests could check whether the attribute exists, but not if the alt text describes the image or the author’s intention in using the image adequately. The same thing happens when you are dealing with topics of “reasonable tab order”, “logical reading sequence”, or “link texts that convey the purpose of the link unambiguously”. Only a human, and not a machine, could tell you in these cases whether you did your job right or not in terms of accessible design.
Overall, circa 30% of accessibility violations and issues can be detected automatically (by the machine mentioned above). While this may read as a bummer the first time you are confronted with it – it is definitely better than nothing.
#Accessibility Testing as education
Like most testing, accessibility testing serves a project and a team on at least two levels: Firstly, and given the tests cover crucial functionality or content, it gives a team or individual the confidence to refactor or extend their code without breaking things.
Secondly, tests serve as documentation. Concerning accessibility, I would say that I can extend this argument even further: tests covering accessibility - as limited as they may be by definition - serve as education for teams and individuals on the topic of inclusive solutions in projects (if they happen to look into the tests, of course). If they work on a feature and somehow cause the tests to fail, a set of accessibility tests can make them aware of functionality that existed and that they accidentally broke. At least in the case of the axe-core test runner, the feedback to a failing test is often very precise and referring to either to the Web Content Accessibility Guidelines (WCAG) or a best practice. Team members who are unfamiliar with web accessibility but confronted with failing accessibility tests have now at least starting points for their own research. Of course, it is better if they approach their colleagues or superiors instead. Nevertheless, they can now do this with very specific cues - the output of the failed test.
With all that said, I don’t want to deny that automated testing is not perfect, even in the realms of where it has its strengths. These tests can always be yielding either false positives or false negatives. Still - having a suite of accessibility tests in place is better than having none. For various reasons, that is: It communicates that accessibility is important to the team. It is a sign of commitment that a level of accessibility in a project is worthy of being preserved (and even expanded upon?). Last but not least, it offers starting points for team members new to the topic. These advantages still outweigh the disadvantages if accessibility testing is not oversold as something it cannot do.
#Linting
Linting is helping to adhere to a certain standard and style of coding. It is one of the pillars of ensuring software quality overall - and prevents style debates at the Pull Request level. For example, linter rules can determine how to write if blocks, how exactly to return values and which attributes must not be omitted. Linting works in practice in that your code editor or terminal nags you about some violation of a linting rule either while you are typing or at the “save” event. So linting is about receiving instant feedback to save you from more work and discussions. At the same time, it educates your team in the same manner accessibility integration testing does.
Special accessibility linting is available as well! Instead of return values, accessibility linting can ensure, for example:
- that every input has a label.
- that every image has an alt text (it can be empty but must exist).
- that click events that you add to elements (and are not native buttons) also have keydown events.
At the date of writing, the most common linter is ESlint. It offers various plugins for many frameworks, libraries and priorities, and one of them that are useful in the sense of this chapter is eslint-plugin-vuejs-accessibility. This plugin checks .vue files specifically in regard to detectable accessibility errors). If you created your project with vue-cli and selected either one of the default presets or eslint as a feature, you can use it as follows:
npm install eslint-plugin-vuejs-accessibility --save-dev
Then, open your eslint configuration. In case you chose one of the default options when creating your project with vue-cli, you can find it in the project’s package.json. Next, search for the eslintConfig key and add another key called “plugins”. Like in the following code, you can omit the eslint-plugin- prefix:
{
  "plugins": ["vuejs-accessibility"]
}
Configure the linting rules in the next step. A good starting point is to enable all recommended rules at once. This is possible when you add the following code to the extends key in your eslint configuration:
{
  "extends": ["plugin:vuejs-accessibility/recommended"]
}
Finally, start your development server. From now on, eslint will inform you about accessibility violations and will prevent your development server from starting when there are accessibility related errors, such as a missing alt attribute on an image:
error img elements must have an alt prop, either with meaningful text, or an empty string for decorative images
#Checks in your browser
The following section is not Vue specific. That’s because the rendered code is what counts for actual users. It is crucial that the code is semantic, the styling adaptable and functionality with the keyboard alone is ensured. What is not important for the user is the way it was built or which tools or frameworks were used.
Here are some all-purpose browser extensions, browser-based tools or web services that are powerful and mature enough to work on the edge of what’s automatically testable - or specialize in features and visualization of, for example, heading (structure) and landmark regions:
- Google Chrome has a checker called “Lighthouse” built-in (open the dev tools and search for the Lighthouse tab). Among other checks, like Progressive Web App and performance metrics, it checks for accessibility, namely using and embedding the following script:
- “axe”, which is available for Chrome, Microsoft Edge and Mozilla Firefox. This accessibility checker, built by the company Deque, is based on the
axe-corescript written in NodeJS and is considered gold-standard in accessibility checkers. You can get axe for either Google Chrome, Microsoft Edge or Mozilla Firefox here. - “WAVE” from WebAim (the ones with the WebAim Million, mentioned in chapter 1) is a very seasoned web accessibility tool that is either reachable at http://wave.webaim.org or as a browser extension that feeds the browser’s current URL into the tool.
- Microsoft’s “Accessibility Insights for Web” is less of a checker and more of an auditing tool. While the browser extension offers automatic tests, its core strength is a guided manual check against accessibility standards and best practices. Accessibility Insights is available for Blink-based browsers here.
- “pa11y” is actually a whole set of tools. In its core it is command-line based NodeJS script that checks for detectable accessibility violations, so it can be added with
npmand run as part of your existing test commands. Built on top of that are dashboard, webservice and continuous integration (CI) features. You can find Pa11y here. - “tota11y” is a tool for visualizing how a website performs with assistive technologies such as screen readers. While it’s clear that this should replace checking in a real screen reader, tota11y aims to make testing for assistive technology more approachable and less abstract. As a script, you add into a page or web app. Once installed, it helps you find missing labels, low contrasts, confusing link texts and even tries to simulate screen reader output.
- “headingsMap” gives you a quick overview of your headings and their structural tree. When you enable this browser extension, you can see at a glance whether your headlines are meaningful, and your headline structure is sound – more or less like a screen reader user would experience them. headingsMap is available for Google Chrome and Mozilla Firefox
- “Landmarks” renders ARIA’s landmark regions visually as part of your page and helps you to debug. With this browser extension (Google Chrome, Mozilla Firefox) it is so much quicker to detect whether your landmarks make sense or need additional labels.
Additionally, some tools are especially helpful to check web apps:
#nerdeRegion
nerdeRegion is a browser extension and debugging tool to control live region output. Again, bear in mind that this does not replace a thorough check in a screen reader. But it helps give a first impression on whether your live regions work and are outputting the right texts in the first place.

#nerdeFocus
nerdeFocus is a tool specialized for focus management and creating a comprehensive list of what element is in focus, in what order.
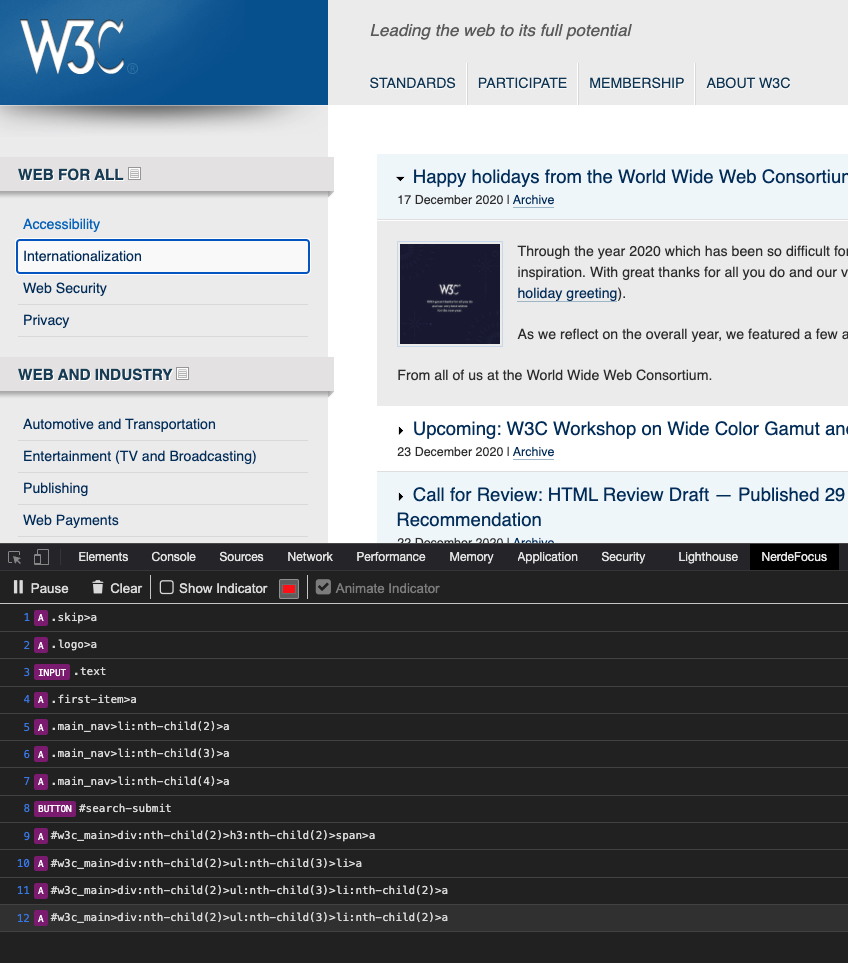
It’s from the same creator as “nerdeRegion” but is limited to Google Chrome. For all other browsers, there is a browser bookmarklet available here.
#vue-axe
Vue Axe is a wrapper around axe-core from Deque, mentioned above. It acts the same as its counterpart, react-axe in that it outputs detectable accessibility violations (and further explanations) in your browser’s console. Learn more about its installation, its usage with “Vanilla” Vue and nuxt.js, its API and options over here.
#Unit tests
If you happen to already have a testing infrastructure in place and are testing on the unit and snapshot test level with Jest test runner, you can actually combine strengths of both Deque’s axe and Jest with jest-axe. The script is a custom Jest matcher.
If you are already using the jest test runner in your test suite, you can easily add the custom Jest matcher jest-axe. The first step is, as always, the installation:
npm install jest-axe --save-dev
A most basic and framework-agnostic usage goes like this:
Now go edit one of your existing test files, and add both jest-axe and toHaveNoViolations as named imports (comment 1). Then you make sure that the latter can be used with jest's expect function (comment 2):
const { axe, toHaveNoViolations } = require('jest-axe'); // (1)

expect.extend(toHaveNoViolations); // (2)
Then you proceed with writing the test itself. For this example, our HTML consists only of an image element with a blatant violation of accessibility standards: no alt attributes on images.
it('should demonstrate this matcher`s usage', async () => {
  const render = () => '<img src="#"/>';

  // pass anything that outputs html to axe
  const html = render();

  expect(await axe(html)).toHaveNoViolations();
})
When you now run npm test, the test fails as expected:
“Images must have an alternative text (image-alt)”

Try fixing it with this help: https://dequeuniversity.com/rules/axe/2.6/image-alt?application=axeAPI
In the case of a failing test, developers are now not only notified, but they are also given a link to find out why it happened and what to do to fix it.
I barely scratched the surface here. You can learn more about Jest and its usage specifically with Vue here and in the great book “Testing Vue Applications” from Edd Yerburgh.
One last thing - because one pillar of good accessibility in web apps is focus management, it deserves to be tested. For that, you must programmatically detect if an element is in focus at any given time. Here is how to do that:
// We’re setting the focus here to the first input in “container”.
// Remember that elements which will receive focus should either be
// focusable natively (see https://avue.link/focusable) or have
// tabindex =-1 applied!
expect(document.activeElement).toBe(container.querySelector('input'))
#End-to-end, or inter-component testing
Sometimes it is not enough to test on a component level alone. Accessibility can’t be always limited to single components; sometimes it is the interaction of parts, or in this case, components, that ensure an inclusive experience. Think focus management - an application’s creator has to ensure that focus is not lost, especially when some user interface parts have a modal character (see chapter 2 for the definition and chapter 4 for concrete focus flows).
So a developer can’t implement this form of inter-component testing (or “testing the interoperability of components”, how Marcy Sutton calls it) with a testing tool that is limited to the component level. Instead, this tool has to work with a real browser and emulate a user’s input and behaviour as good as possible. The most suitable tool in this regard is Cypress. According to its description, it aims to simplify the setup, writing, execution and debugging of end-to-end tests. Integration and unit tests should also become easier.
While it is worth writing a whole book about opportunities Cypress gives to web developers (and I guess there is a book already in the works somewhere), I can only provide starting points here in "Accessible Vue". Let’s limit the following example to a simple check of a component’s focus management.
For this, I’m going to use vue-a11y-dialog, an accessible modal script that has all the needed functionalities, roles, and states that an inclusive modal dialog should have (see chapter 4). We know that the script has proper focus management in place and its own set of test to ensure just that. But since this section is about how to end-to-end test with Cypress, let’s demonstrate testing using Cypress either way.
As you might know, the most convenient way to get starting with a new Vue project is using vue-cli. Additionally, the most convenient way to start with Cypress is to add the corresponding vue-cli plugin.
First, create a new project with:
vue new my-project
Alternatively, you could add the plugin to an existing vue-cli project. Regardless, the following step is the crucial one: The installation of both Cypress itself and the corresponding plugin.
vue add e2e-cypress && npm install cypress --save-dev
The next step is to install vue-a11y-dialog. Following, I won’t put an emphasis on how to actually installing implementing the modal dialog in your app, since the focus (pun intended) is on Cypress in this section, and it was already covered in chapter 4. Regarding its usage, I point you towards the readme in vue-a11y-dialog ’s readme.
Having the modal in place, let's now concentrate on writing the test. vue-cli's Cypress plugin created files and folders in your project. One of them is /tests/e2e/specs/test.js. Open this file and fill in the following:
describe('My first test', () => {
  it('checks whether focus gets managed on opening and closing the modal', () => {
    cy.visit('/');
    cy.get('button#modaltrigger').click();
    // That is the close button:
    cy.get('[data-a11y-dialog-hide]').focused().click();
    cy.get('button#modaltrigger').focused();
  })
})
Please note that I added an id of modaltrigger to the button that is, well, triggering the modal. There are other ways to select a particular element, but for the sake of this simplified example, I found it to read the best.
Before we run our tests, let’s recap what we have just told Cypress to do in test.js:
- Visit the homepage.
- Find the button element with the id of
modaltrigger. - Click it.
- Expect the close button in the modal to receive focus.
- Click the close button.
- Expect the focus to return to the button element with the id of
modaltrigger.
To actually run Cypress, type the following in your terminal and hit the enter key:
npm run test:e2e
This starts the development server of your app and, on top of that, the Cypress user interface, which lists all the single test files in your project. Select test.js to run it.
What happens now is that a Chromium browser window opens, and your tests are being run as described in the spec file. The left part of the browser window lists all the tests and all the single steps inside them. In the case of our modal focus test, it runs the steps as described above. What makes Cypress fascinating is the right part of the screen: It renders your app visually while user behavior and input is simulated. Additional you aren’t only able to observe “what Cypress is doing”, but can click upon single steps on the right and see the app rewind into the according state. For example, click on Step 4 to see the modal open, and the focus being set on its close button.
To reiterate: This example is very simplified and even unnecessary in the case of vue-a11y-dialog. However, I hope that by scratching the surface of what Cypress can do, you are getting an idea of how to fill the gap that strictly component-based testing leaves and how Cypress can help fill it.
# The most important testing of it all
With all that being said, with all the tools mentioned helping you test your app automatically or semi-automatically, I feel the urge to emphasize it again: Even when all tests return green, you cannot assume that your app is accessible. The green result is a result of at least two cut sets: First, the tests you’ve written in the overall pool of accessibility tests that are automatable in the first place. Secondly, automated tests in the set of all necessary sets of tests to provide a certain level of accessibility. The last set is estimated to be 30%, meaning: only 30 percent of potential barriers can be detected programmatically.
So automated testing can be helpful, educating and let you refactor with more certainty. But does not show the complete picture of accessibility - by definition, it is not able to. The method to achieve a greater deal of accessibility is simple and complex at the same time: asking actual users. Inquire them about their strategies in using your site, barriers they are confronted with and whether your app is accessible with assistive technology (AT) they are using. Don’t assume that your own way of using a screen reader, for example, is representative of typical screen reader usage.
Keep in mind that in the end, you are using a screen reader very rarely, if at all - whereas there are people with disabilities depending on this form of technology. Most of them could use the screen reader in forms (or speech output velocities) you can’t even imagine. As Paul Bohman of Deque puts it:
They are the real experts in disability access to the web, because they live it.
So the most central piece of advice in this chapter is: Leverage the advantages that automated testing offers to you and your project. At the same time, don’t overstate the green test results you get. Manuel Matuzovic has an amazing blog post of how to fool those checkers by building the most inaccessible site possible with a perfect Lighthouse score. Don’t stop when you covered both the unit and the end-to-end level and when all tests are green. Instead, ask people in the next step and remember that is the most essential form of testing.
Assemble a diverse group of users, form a panel, and run your tests as soon as your app reaches its first usable stage. If you are working for an agency, and you are already running user experience (UX) tests of visual designs in the screen design or conceptual phase of a project, complement these with accessibility related testing sessions. Ask whether icons are clear, colors match contrast expectations, and your information architecture works. Additionally, don’t forget the overlap of UX and accessibility: If a design, functionality or widget can’t be understood at all by some of your users, it hurts both UX and accessibility. Further, it shows the problems are so fundamental that it will pose problems to humans with cognitive disabilities as well.
If you have trouble creating a panel, more and more services and agencies specialize in finding testers with disabilities. Some of the english speaking providers are: Fable, BarrierBreak, Knowability’s AccessWorks, AbilityNet, WebUsability and TeamUsability. W3C’s wiki has some more starting points and ideas listed in the “Recruting Testers” document. But in the end, user testing is more or less individual for each project since it comes down to the specific market, user groups, industries and regions you are working in. Even asking just a few people is better than only relying on meeting (most basic) standards or, even worse, automated tests that are limited by definition.
#Action Steps for this chapter
- Install the axe browser extension in Chrome or Firefox, or use the Accessibility part of Google's Lighthouse.
- If you are using eslint already, consider adding
eslint-plugin-vuejs-accessibilityto youreslintsetup. - If you are using Jest, consider adding
jest-axeto your setup. - For the most important testing of it all, reach out to your existing user base. Ask where they encounter barriers. As a next step, run tests with users with disabilities.